
So you all know I am a photo maniac! I cannot loose my photos! They are the visual representation of my memories! They are my window to the past!! They are the reminder of the intricacies of my grandmother’s face when my memory fails to pinpoint the exact color of her eyes!!!
I cannot loose them!!!!
So awhile ago I started backing up all of my photos to an external hard drive that is separate from my computer. Because as you know, computers crash! And if an emergency happens, I can just grab the small HD and head for the hills!
This works great for all my digital photos, but not my physical ones. Therefore I have made it a project to scan all my paper photos to store them on my HD as well. *gasp*
This takes FOREVER!! (because I have a million photos!)
Ok, not really. (yes really!)
One picture takes about 3 minutes with my scanner. Because it’s stupid and won’t scan multiple pictures at a time. It probably would if I would physically connect it to my computer (it’s wireless), but who wants to hassle with that? I thought about spending the big bucks and getting one of those auto-feed scanners. But that still takes time. A lot of it!
So I started searching for a service that would scan them in bulk for me. There are many of them, and many of them cost more than my computer cost! But there is one I found that did not charge outrageous prices. It’s called Scan My Photos. Dot com.
Scan My Photos had a special going called the VIP package wherein they would scan 1000 4×6 photos for $39.95! Wow! Their company had been recommended by entities I trust, like Real Simple Magazine, The Weather Channel, and the New York Times, so I decided to try them out.
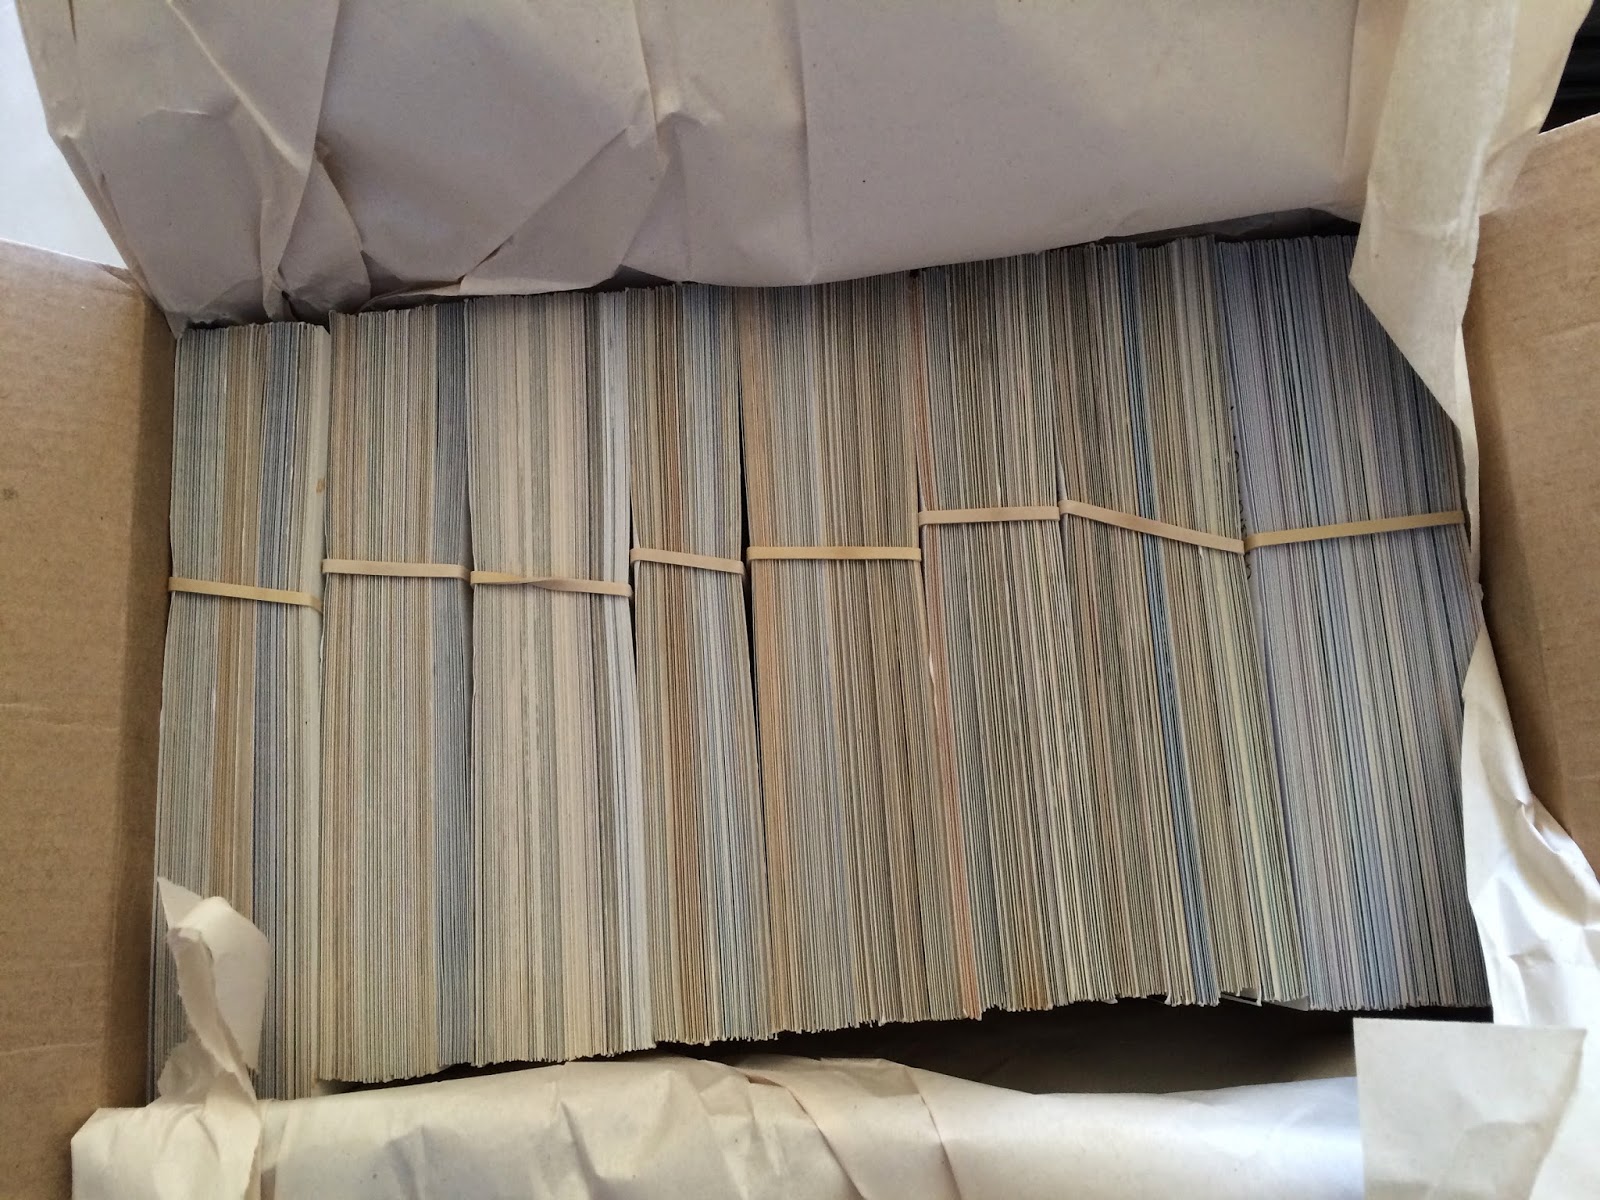 |
| This is what 1000 photos looks like! |
Of course, there are no frills. They scan them in bulk. No separating by rolls of film. You can pay extra for that. You can also pay extra to scan other than 4×6 sizes, to have them touch up your photos (with their “photo soap”), and pay for a higher dpi. The standard package includes 300 dpi, but you can upgrade to 600 dpi. What’s the difference? Well depends on what you are doing with them. I’ll explain in a minute.
So, I opted for the generic VIP package with no add-ons. I decided I would try it out with my less valuable photos and see how it was. Here is what I did. (And this took forever!)
They instruct you to make sure all photos are facing right-side up, clump them into groups of 100-150 and and put a rubber band around them. They will just grab one clump and scan it as is.
I am a tad OCD so I could not just pile any old 1000 photos into a box and ship them off! I had to separate them into rolls. You know, the rolls of film they were developed from. And then I dated them. And counted them. And noted all of this info on a blank 4×6 index card that I added to the front of each set of photos.
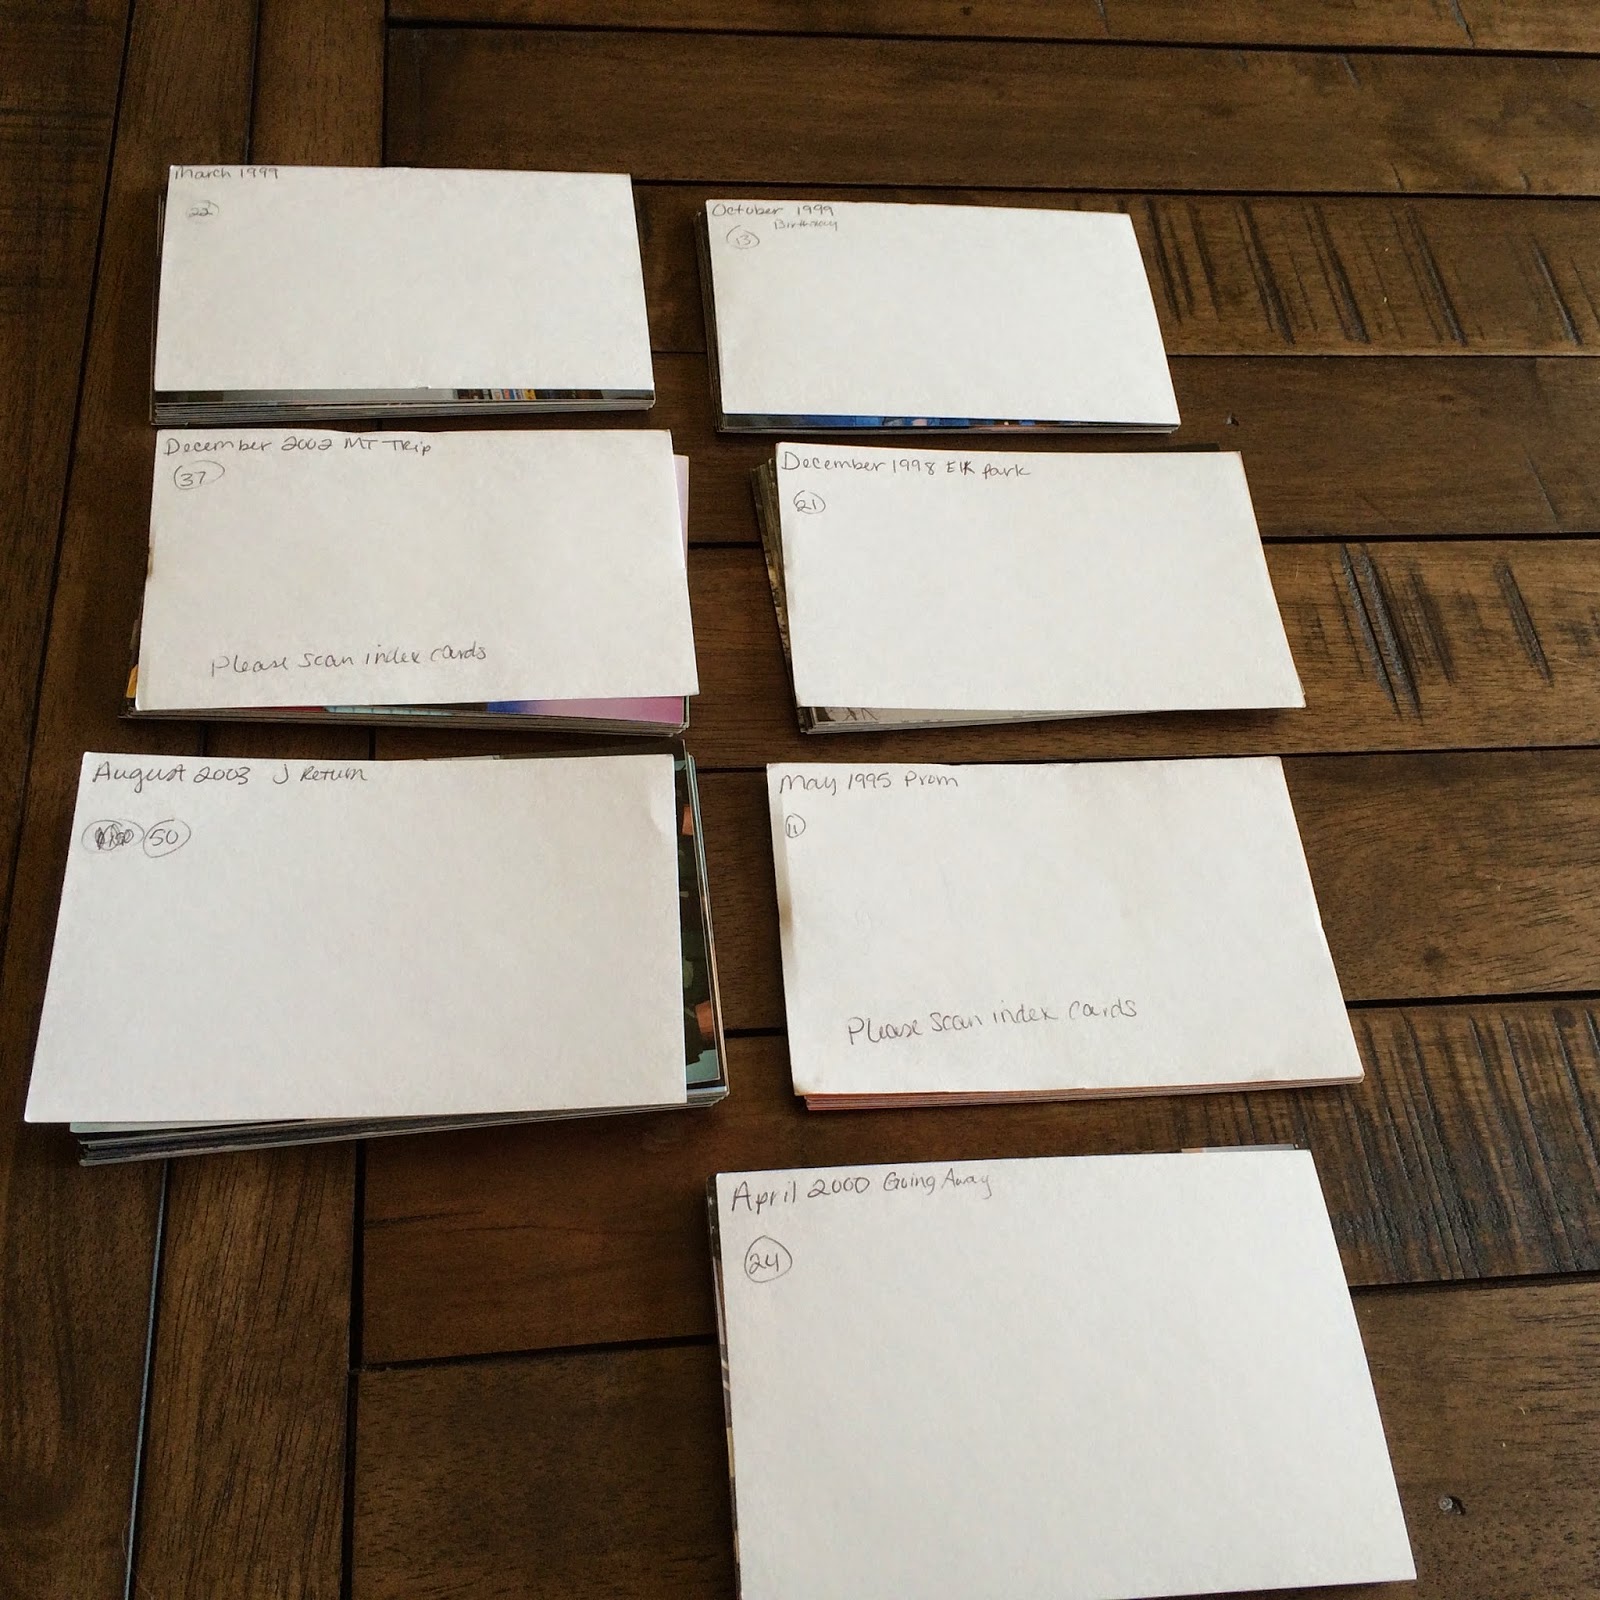 |
| Separated into rolls and each is titled and dated |
And then I clumped them into groups of 100-150 based on the dates (oldest first!) and did not separate any rolls! On the front index card of each group I wrote “please scan index cards”. (In their instructions online, they say they will scan index cards but it will be counted toward your total. So each index card counts as one photo. I ended up having about 13. Not a big deal in terms of hundreds!)
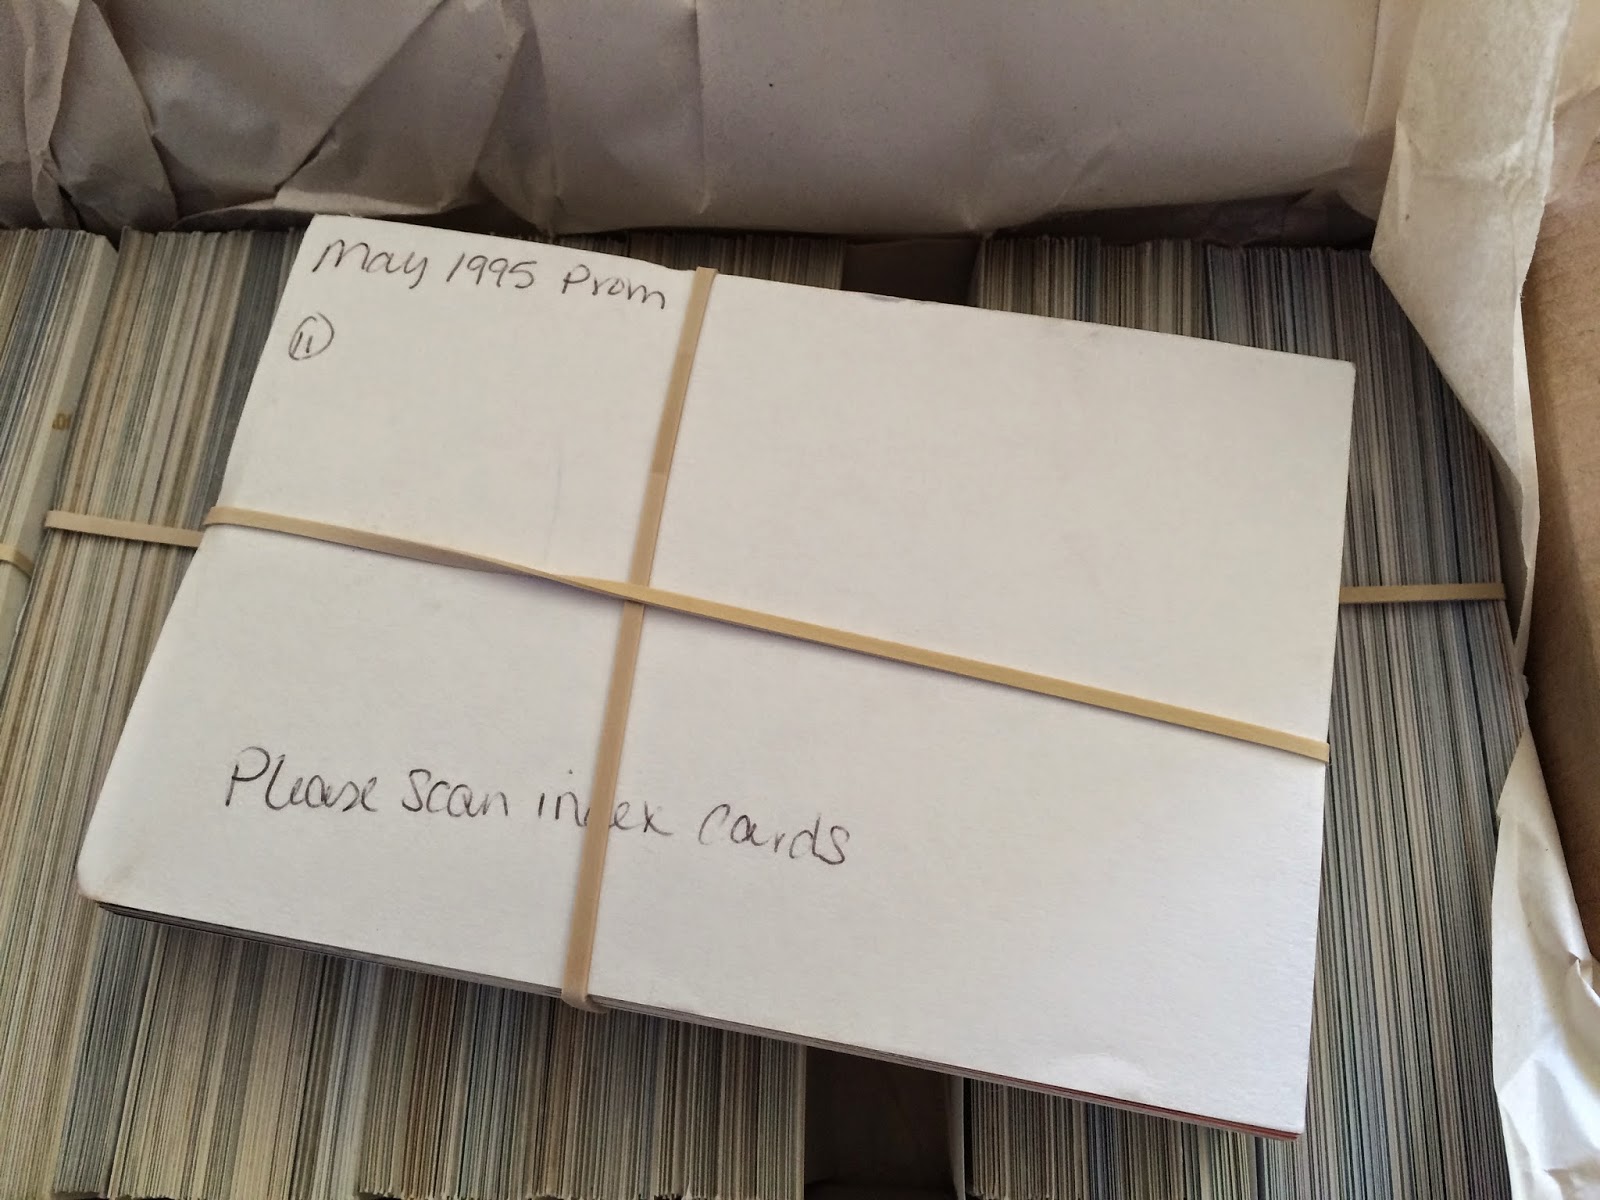
Now here is where the index cards come into play. All 998 of my photos are in one large file.
All of them. Could you imagine sorting that!?
But thanks to my index cards, I can easily see the separation in the rolls of film and can organize them in no time! So taking some time in the beginning saved me a lot of time later on!
 |
| See my index card marker? I so clever! 😉 |

A little grainy but not too bad.
Now this one was taken with a higher-end Nikon N75 35mm camera.

Better quality, but the vibrance is less than the original. Still, just fine if all you want to do is save it.
Here is the difference between 300 dpi (right) and 600 dpi scanned with my scanner (left).
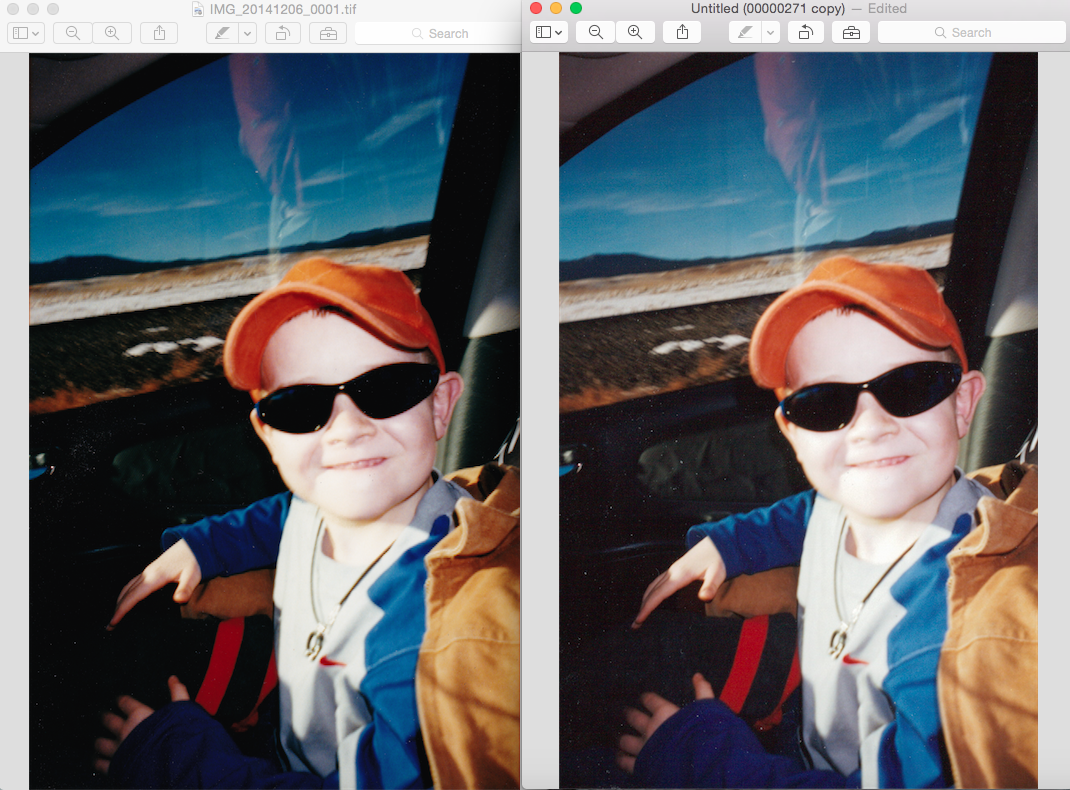
Can you see a difference? How about now when I zoom in?


So, for me, to just have a copy to peruse with no intention of printing them, the 300 dpi is fine. However, with photos that I may have to print, I would opt for the higher 600 dpi.
All in all, I would recommend Scan My Photos! I was nervous sending my pictures off, but the ability to email, chat, call, Facebook, or Tweet the company really helped relieve my stress! They answered the phone when I called (no automated service here folks!) and were very courteous and professional! I’ll use them again. Soon.
Oh, and currently there is a Groupon for their VIP package! You don’t get the option of any of the upgrade options to do it this way, but you do get a 500 photo option!
If anyone tries it, let me know how it goes!

That's a lot of faith to have in a Company when you're sending them every physical memory! I'm so glad it turned out the way it did! 🙂 I need to start the process of backing up all of my photos from the computers to an external drive. The sad thing is that I've had the external drive for about three years already! Just need to find the time! Oh, and thanks for putting up those two adorable faces! Talk about some memories that tug at your emotions! ♥ THEM!
LikeLike